Dans cet article, nous allons préparer l'environnement pour exécuter des conteneurs sur Windows 10 et créer une application .NET conteneurisée simple.
Pour que toutes les étapes ci-dessous se terminent correctement, vous avez besoin d'un système 64 bits avec la version 2004 ou ultérieure et la build 18362 ou ultérieure. Vérifiez la version et le numéro de build en exécutant la commande dans PowerShell winver
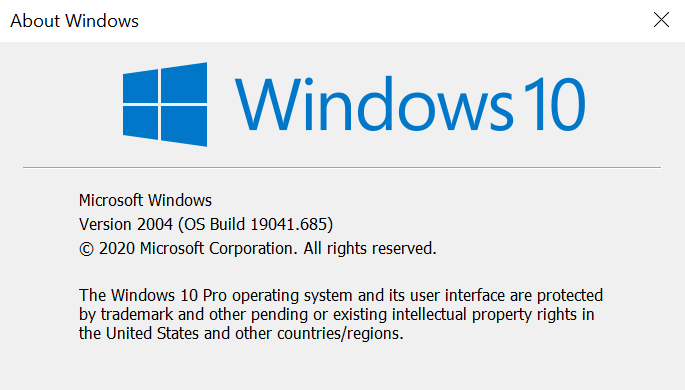
Si la version est inférieure à celle requise, vous devez mettre à jour et ensuite seulement aller plus loin
Installation de WSL 2
Tout d'abord, activons le composant Windows Subsystem for Linux (WSL). Pour ce faire, démarrez PowerShell avec les droits d'administrateur et exécutez la première commande
dism.exe /online /enable-feature /featurename:VirtualMachinePlatform /all /norestart

dism.exe /online /enable-feature /featurename:VirtualMachinePlatform /all /norestart

, shutdown -r -t 1
WSL 2 Linux wsl --set-default-version 2

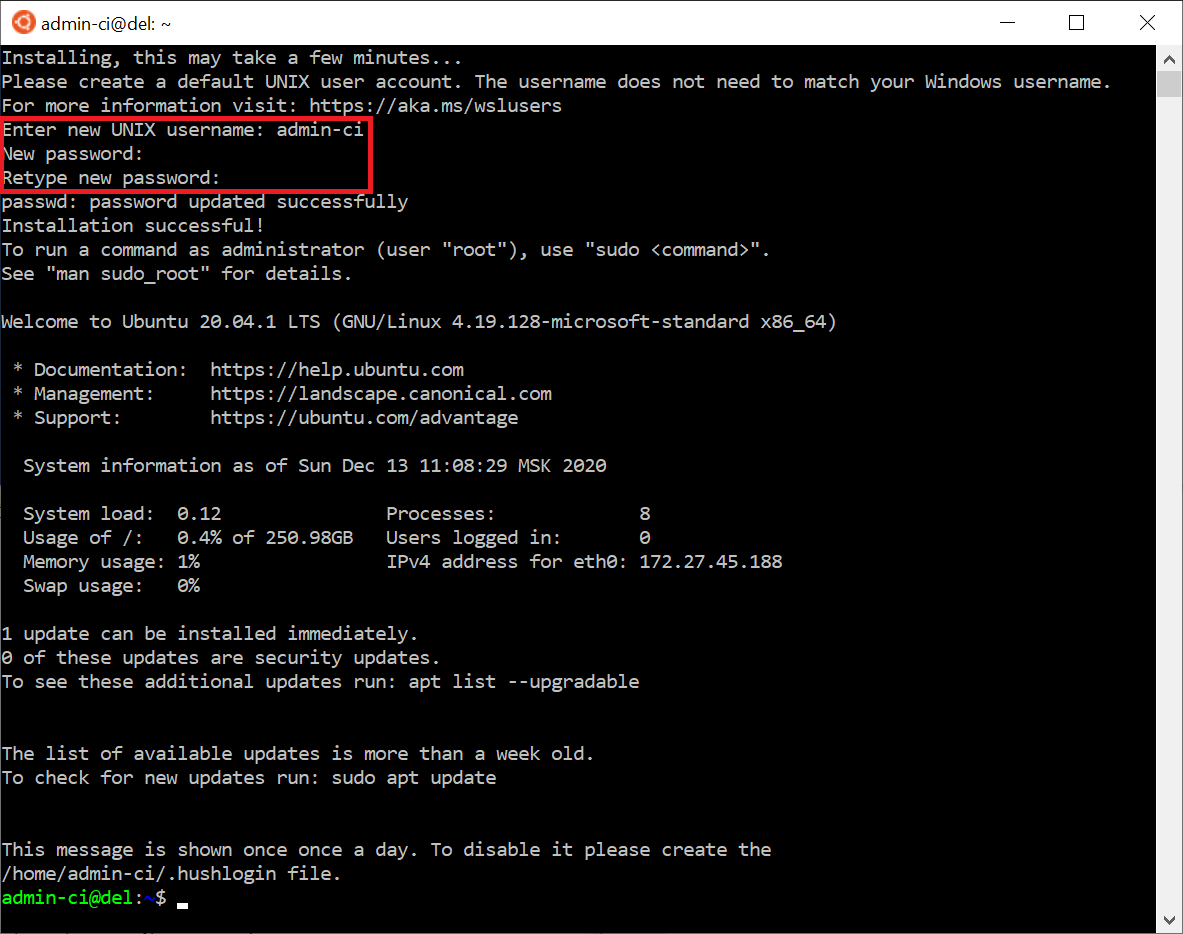
, Linux Microsoft Store, , Ubuntu 20.04 LTS

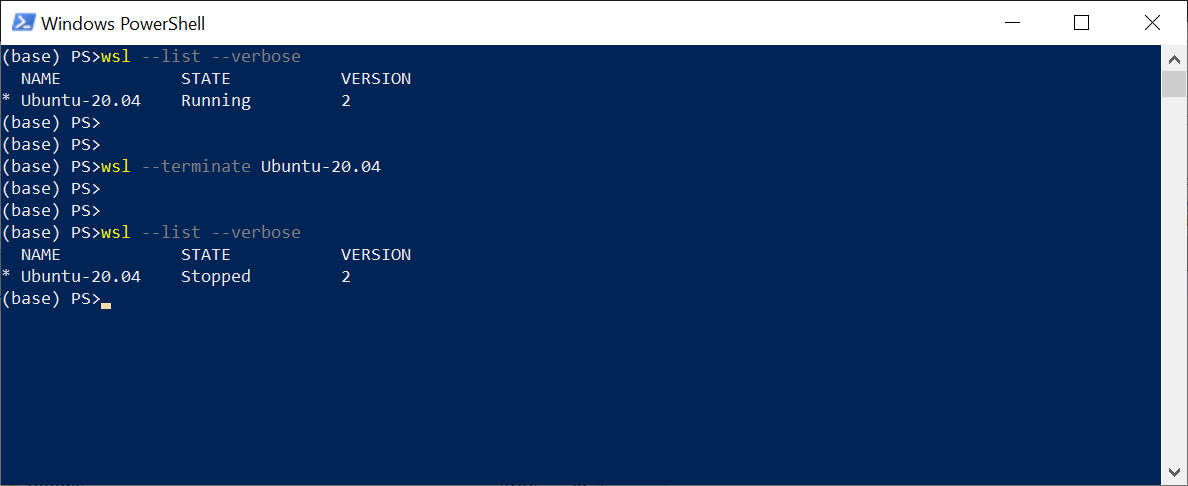
Linux, PowerShell wsl --list --verbose

Linux, wsl --terminate Ubuntu-20.04
Linux \\wsl$
Docker
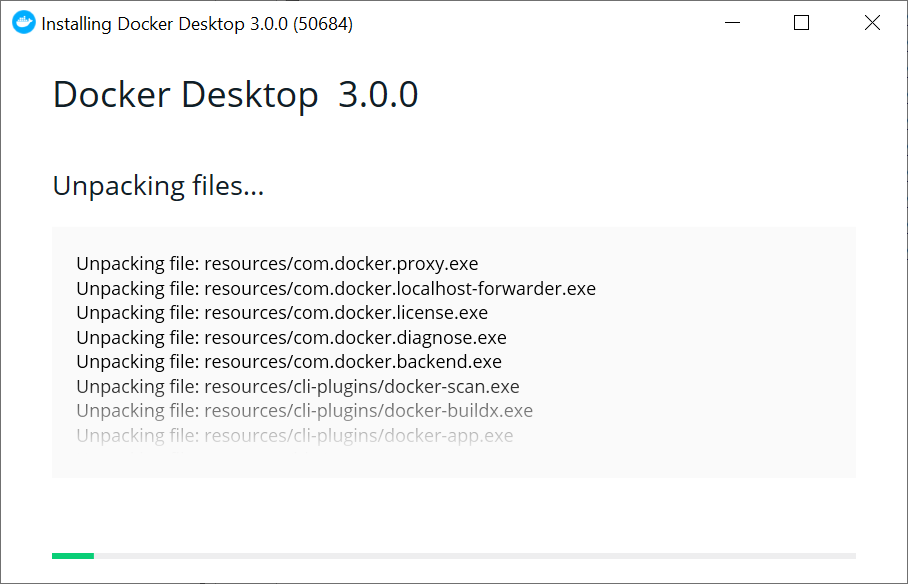
Docker Desktop Windows ,
Docker Desktop Docker Linux (WSL 2)

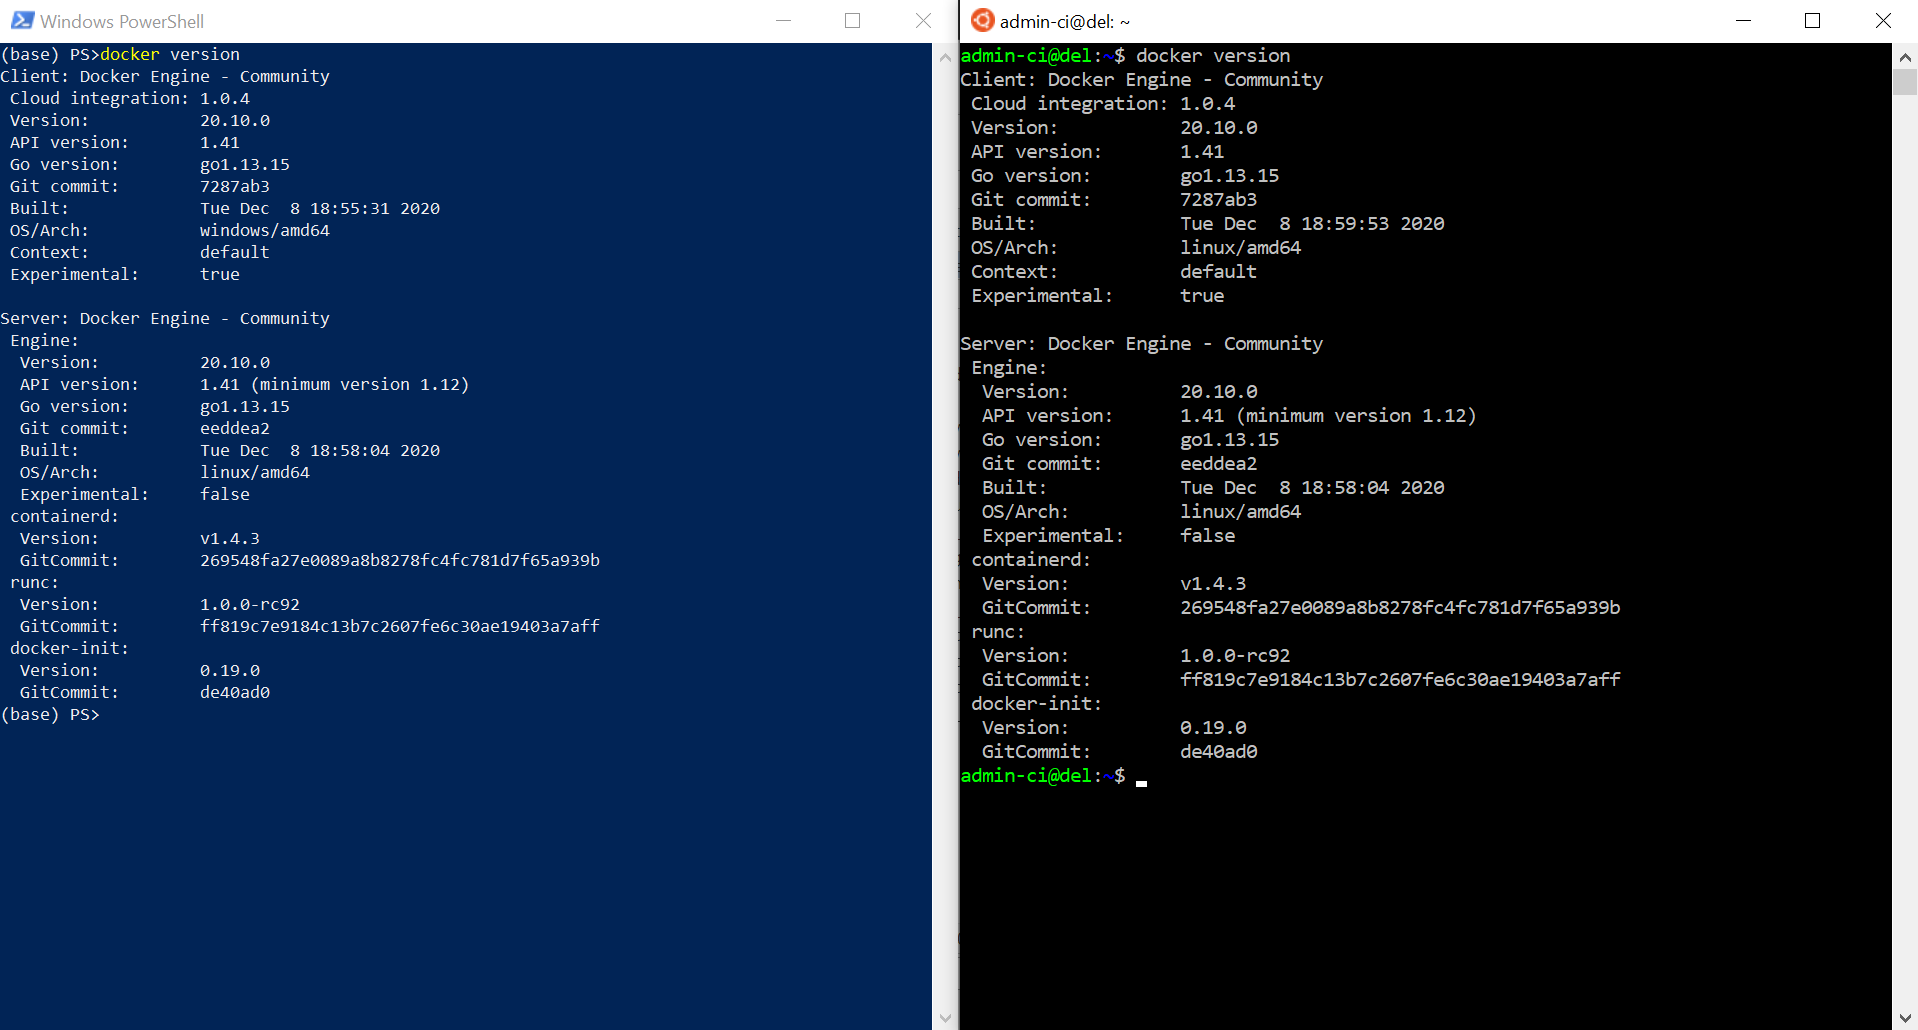
Docker PowerShell, Bash. docker version
, Docker , busybox,
docker run busybox echo "hello docker!!!"

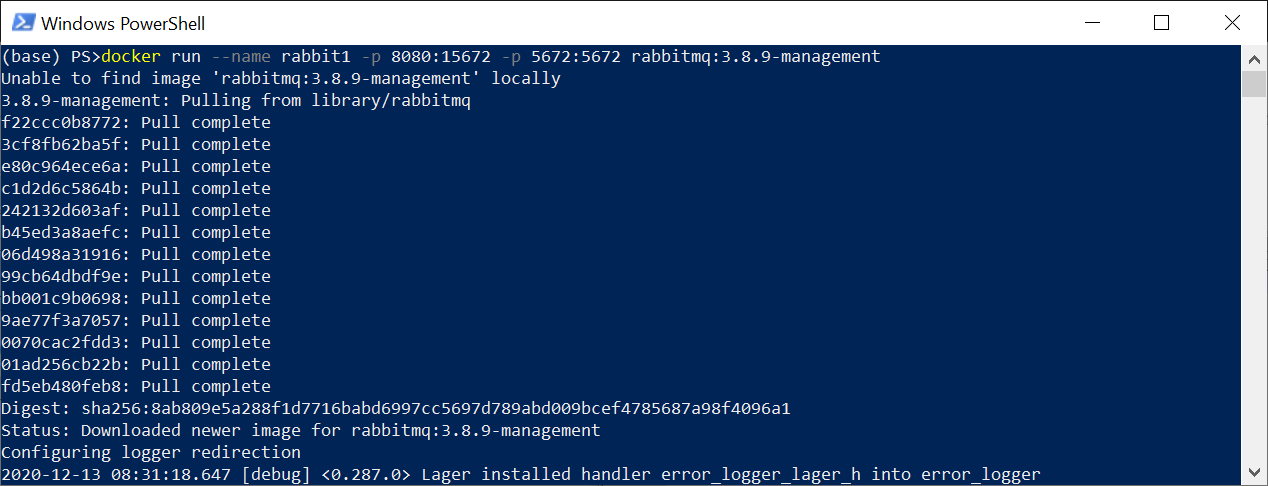
. - . , rabbitmq
docker run --name rabbit1 -p 8080:15672 -p 5672:5672 rabbitmq:3.8.9-management
:
docker run
- . , Docker Hub
--name rabbit1
- rabbit1
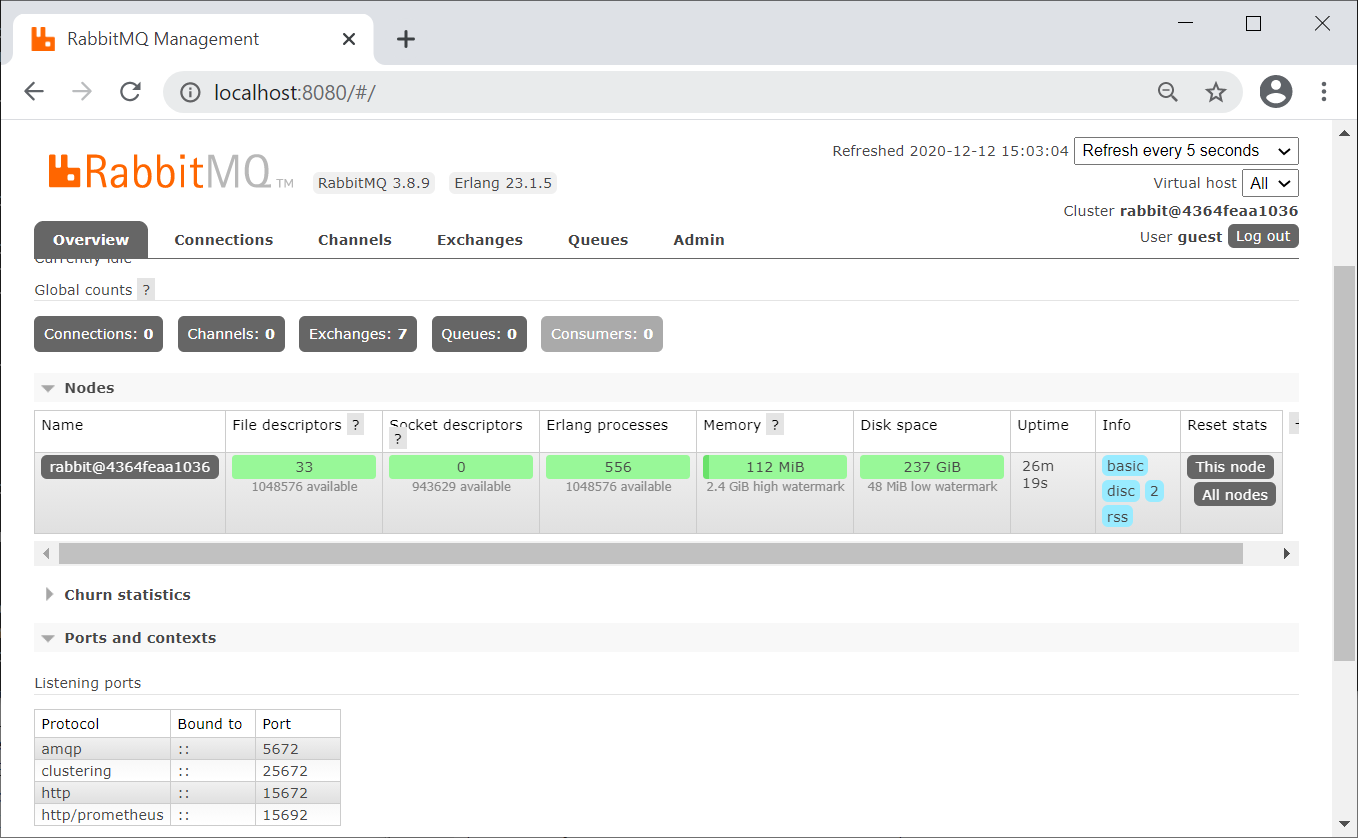
-p 8080:15672
- . 8080 - , 15672 -
rabbitmq:3.8.9-management
- /,
RabbitMQ 5672 8080
, , docker container ls --all
docker ps -a

: docker stop rabbit1
. : docker start rabbit1
.NET
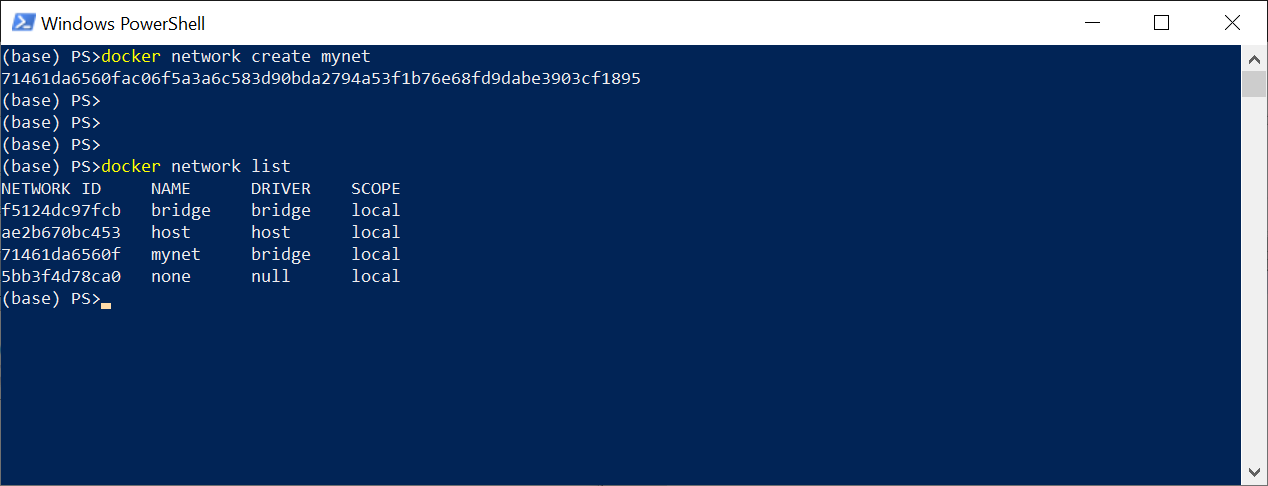
, .. , . bridge, .. , mynet bridge
docker network create mynet
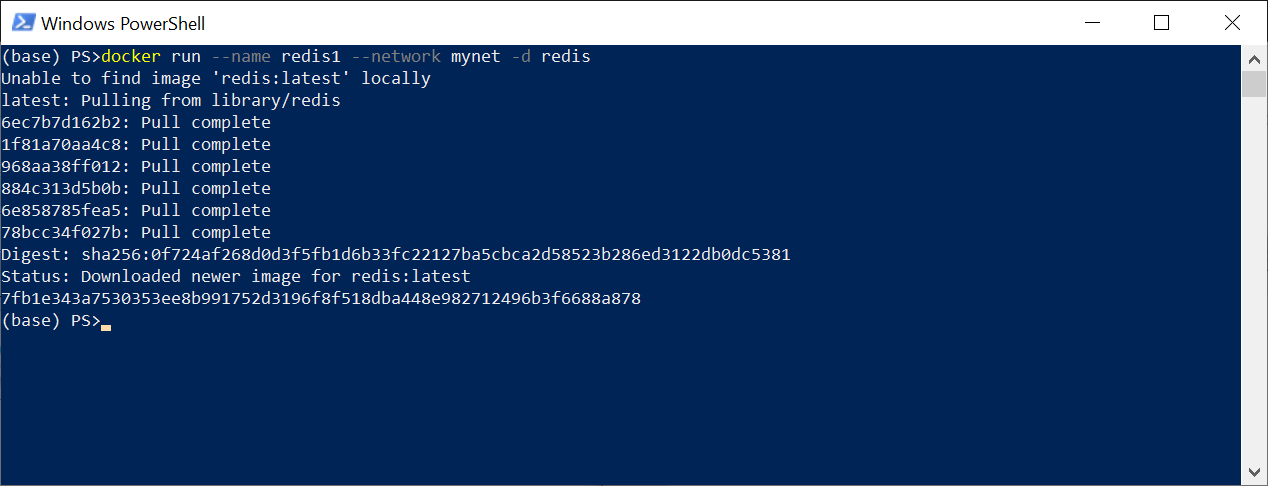
redis . -d
docker run --name redis1 --network mynet -d redis
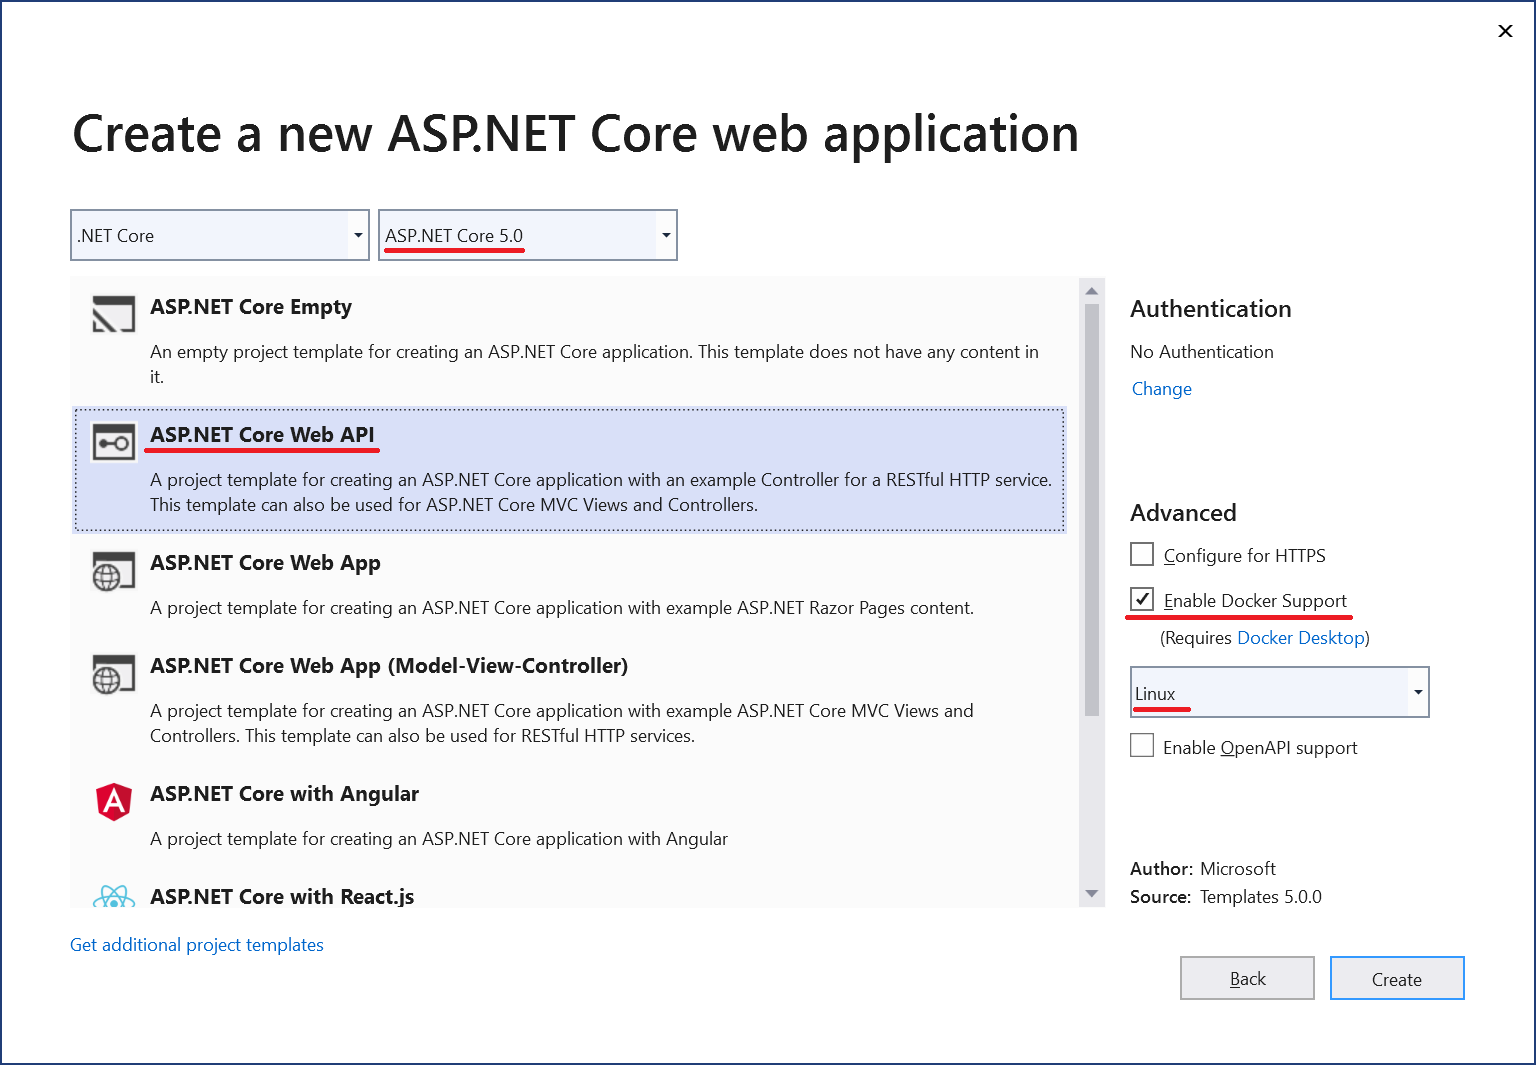
Visual Studio 2019 ASP.NET Core Web API,
Redis StackExchange.Redis Package Manager Console
Install-Package StackExchange.Redis -Version 2.2.4
,
RandomWeatherService.cs,
using System;
namespace WebApiFromDocker
{
public class RandomWeatherService
{
private Random _randomGenerator;
public RandomWeatherService()
{
_randomGenerator = new Random();
}
public int GetForecast(string city)
{
var length = city.Length;
var temperatureC = _randomGenerator.Next(-length, length);
return temperatureC;
}
}
}
RedisRepository.cs,
using StackExchange.Redis;
using System;
using System.Threading.Tasks;
namespace WebApiFromDocker
{
public class RedisRepository
{
private string _connectionString = "redis1:6379";
private TimeSpan _expiry = TimeSpan.FromHours(1);
public async Task SetValue(string key, string value)
{
using var connection = await ConnectionMultiplexer
.ConnectAsync(_connectionString);
var db = connection.GetDatabase();
await db.StringSetAsync(key.ToUpper(), value, _expiry);
}
public async Task<string> GetValue(string key)
{
using var connection = await ConnectionMultiplexer
.ConnectAsync(_connectionString);
var db = connection.GetDatabase();
var redisValue = await db.StringGetAsync(key.ToUpper());
return redisValue;
}
}
}
Startup
public void ConfigureServices(IServiceCollection services)
{
services.AddScoped<RandomWeatherService>();
services.AddScoped<RedisRepository>();
services.AddControllers();
}
, WeatherForecastController
using Microsoft.AspNetCore.Mvc;
using System;
using System.Threading.Tasks;
namespace WebApiFromDocker.Controllers
{
[ApiController]
[Route("api/[controller]")]
public class WeatherForecastController : ControllerBase
{
private RandomWeatherService _weather;
private RedisRepository _cache;
public WeatherForecastController(
RandomWeatherService weather,
RedisRepository cache)
{
_weather = weather;
_cache = cache;
}
//GET /api/weatherforecast/moscow
[HttpGet("{city}")]
public async Task<WeatherForecast> GetAsync(string city)
{
int temperatureC;
var cachedTemperatureCString = await _cache.GetValue(city);
if (!string.IsNullOrEmpty(cachedTemperatureCString))
{
temperatureC = Convert.ToInt32(cachedTemperatureCString);
}
else
{
temperatureC = _weather.GetForecast(city);
await _cache.SetValue(city, temperatureC.ToString());
}
var forecast = new WeatherForecast(
city, DateTime.UtcNow, temperatureC);
return forecast;
}
}
}
Dockerfile Docker.
FROM mcr.microsoft.com/dotnet/aspnet:5.0-buster-slim AS base
WORKDIR /app
EXPOSE 80
FROM mcr.microsoft.com/dotnet/sdk:5.0-buster-slim AS build
WORKDIR /src
COPY ["WebApiFromDocker/WebApiFromDocker.csproj", "WebApiFromDocker/"]
RUN dotnet restore "WebApiFromDocker/WebApiFromDocker.csproj"
COPY . .
WORKDIR "/src/WebApiFromDocker"
RUN dotnet build "WebApiFromDocker.csproj" -c Release -o /app/build
FROM build AS publish
RUN dotnet publish "WebApiFromDocker.csproj" -c Release -o /app/publish
FROM base AS final
WORKDIR /app
COPY --from=publish /app/publish .
ENTRYPOINT ["dotnet", "WebApiFromDocker.dll"]

, mynet
docker network connect mynet WebApiFromDocker

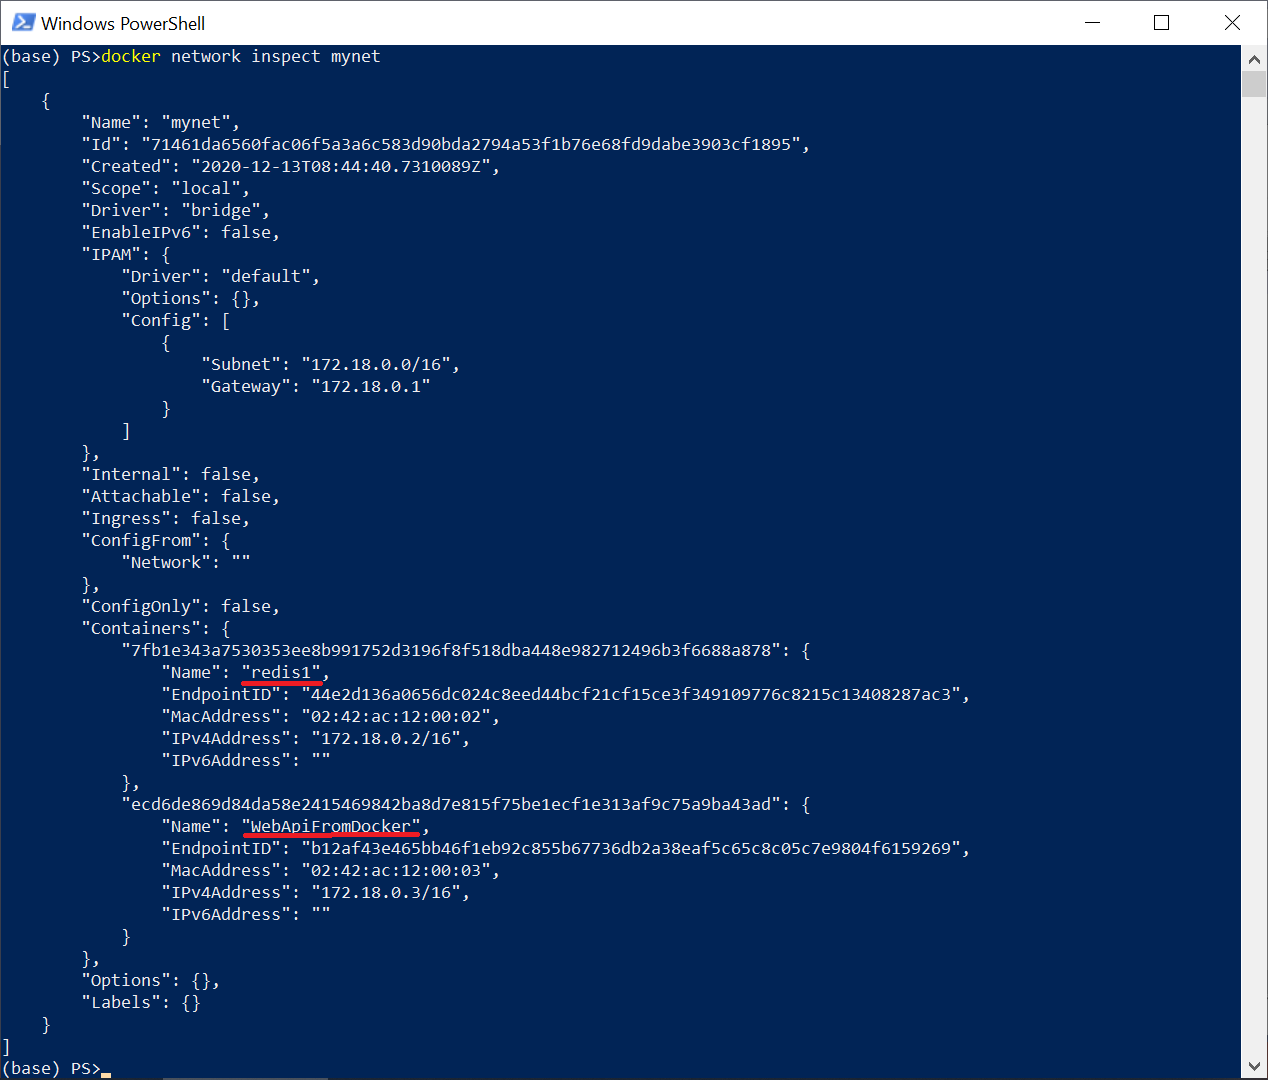
Ensuite, nous nous assurerons que tous les conteneurs nécessaires sont sur le même réseau
docker network inspect mynet
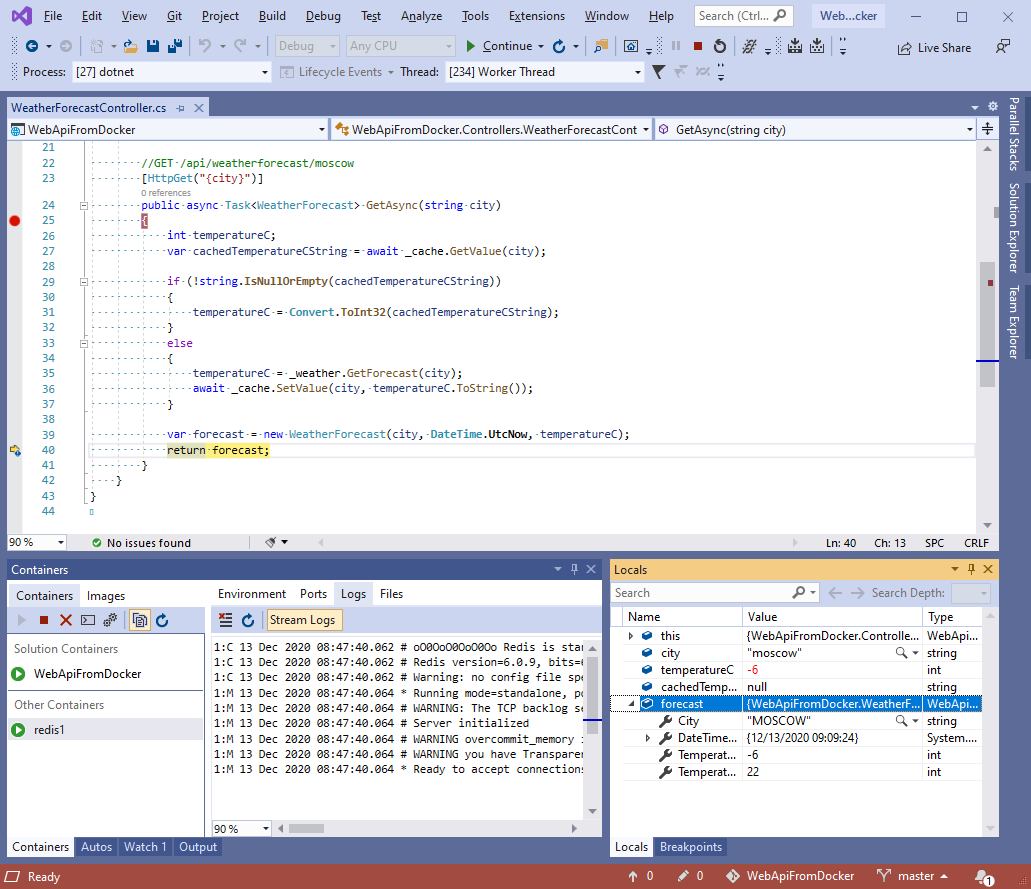
Ensuite, nous installerons Breakpoint dans une méthode de contrôleur unique et enverrons une demande via Postman ou via n'importe quel navigateur.
http://localhost:49156/api/weatherforecast/moscow
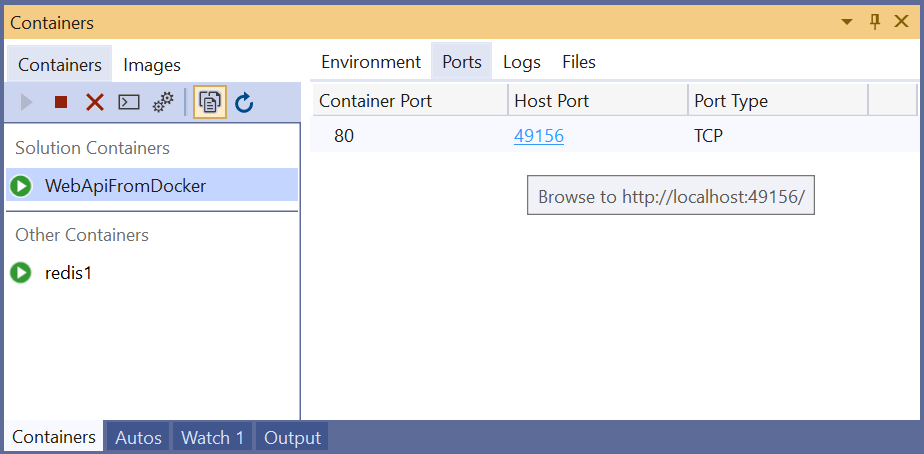
Au fait, le port utilisé dans votre cas peut différer et vous pouvez le voir dans la fenêtre Conteneurs
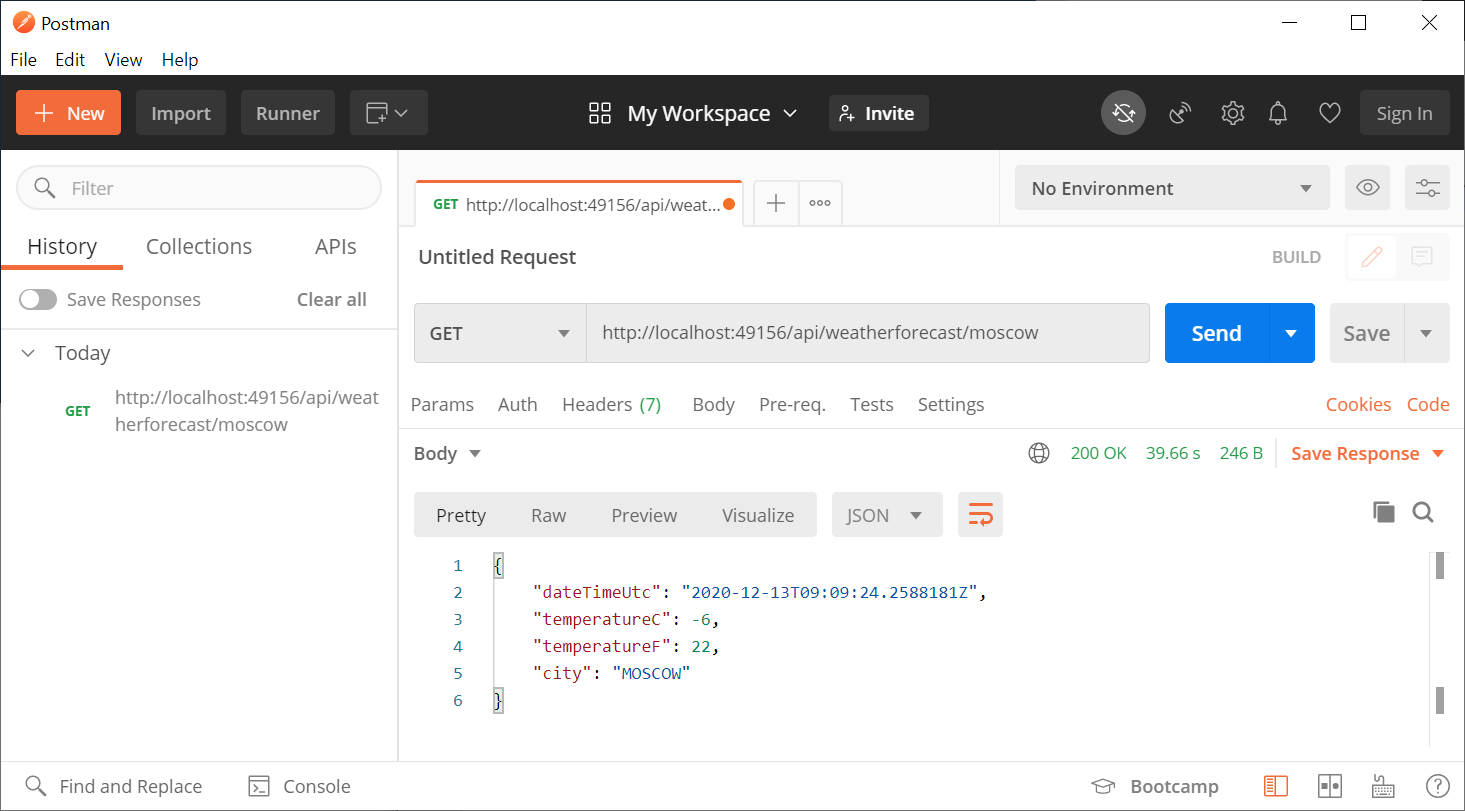
Résultat dans la fenêtre Postman
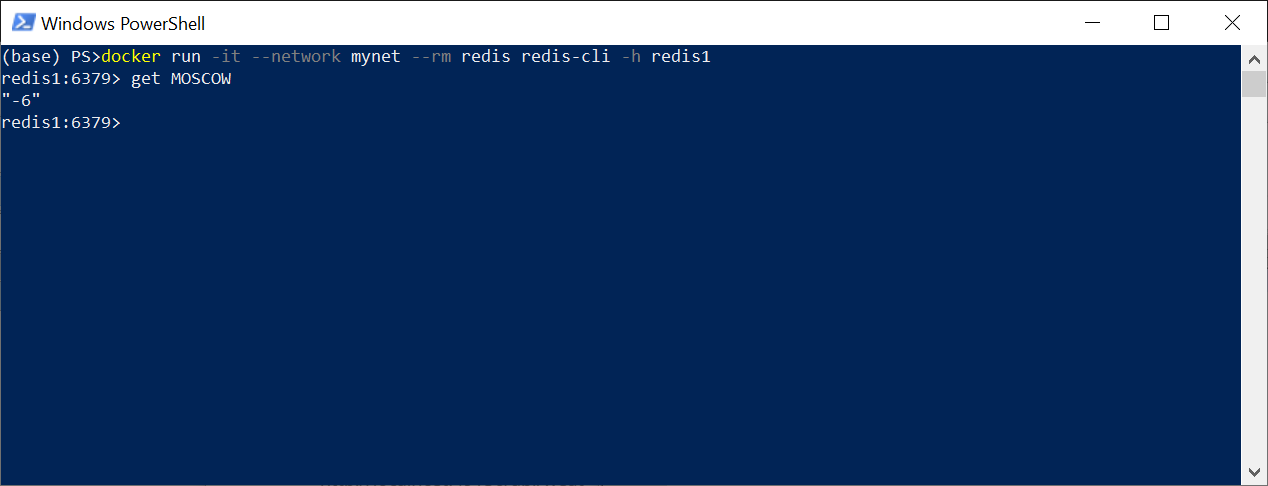
De plus, assurez-vous que la valeur est validée dans redis en vous connectant à l'aide de la console redis-cli
Ok, tout a fonctionné comme prévu!