J'ai décidé que je voulais changer le volume des pistes sonores et audio sur un ordinateur portable sous Windows à partir d'une télécommande infrarouge. Arduino uno, un tas de fils avec une maquette, un capteur infrarouge, un ordinateur portable et, en fait, une télécommande infrarouge.
Il y a une idée, il y a du fer, mais la théorie est boiteuse. Comment puis-je faire en sorte que mon ordinateur comprenne les signaux infrarouges de la télécommande et prenne les mesures nécessaires? J'ai décidé d'utiliser un arduino pour recevoir les signaux de la télécommande via le capteur infrarouge de la maquette et envoyer des messages à l'ordinateur portable via USB. Cela nécessitait au moins une certaine connaissance de la façon dont tout cela fonctionne.
Il a été décidé d'enquêter.
Présentation d'Arduino à la télécommande
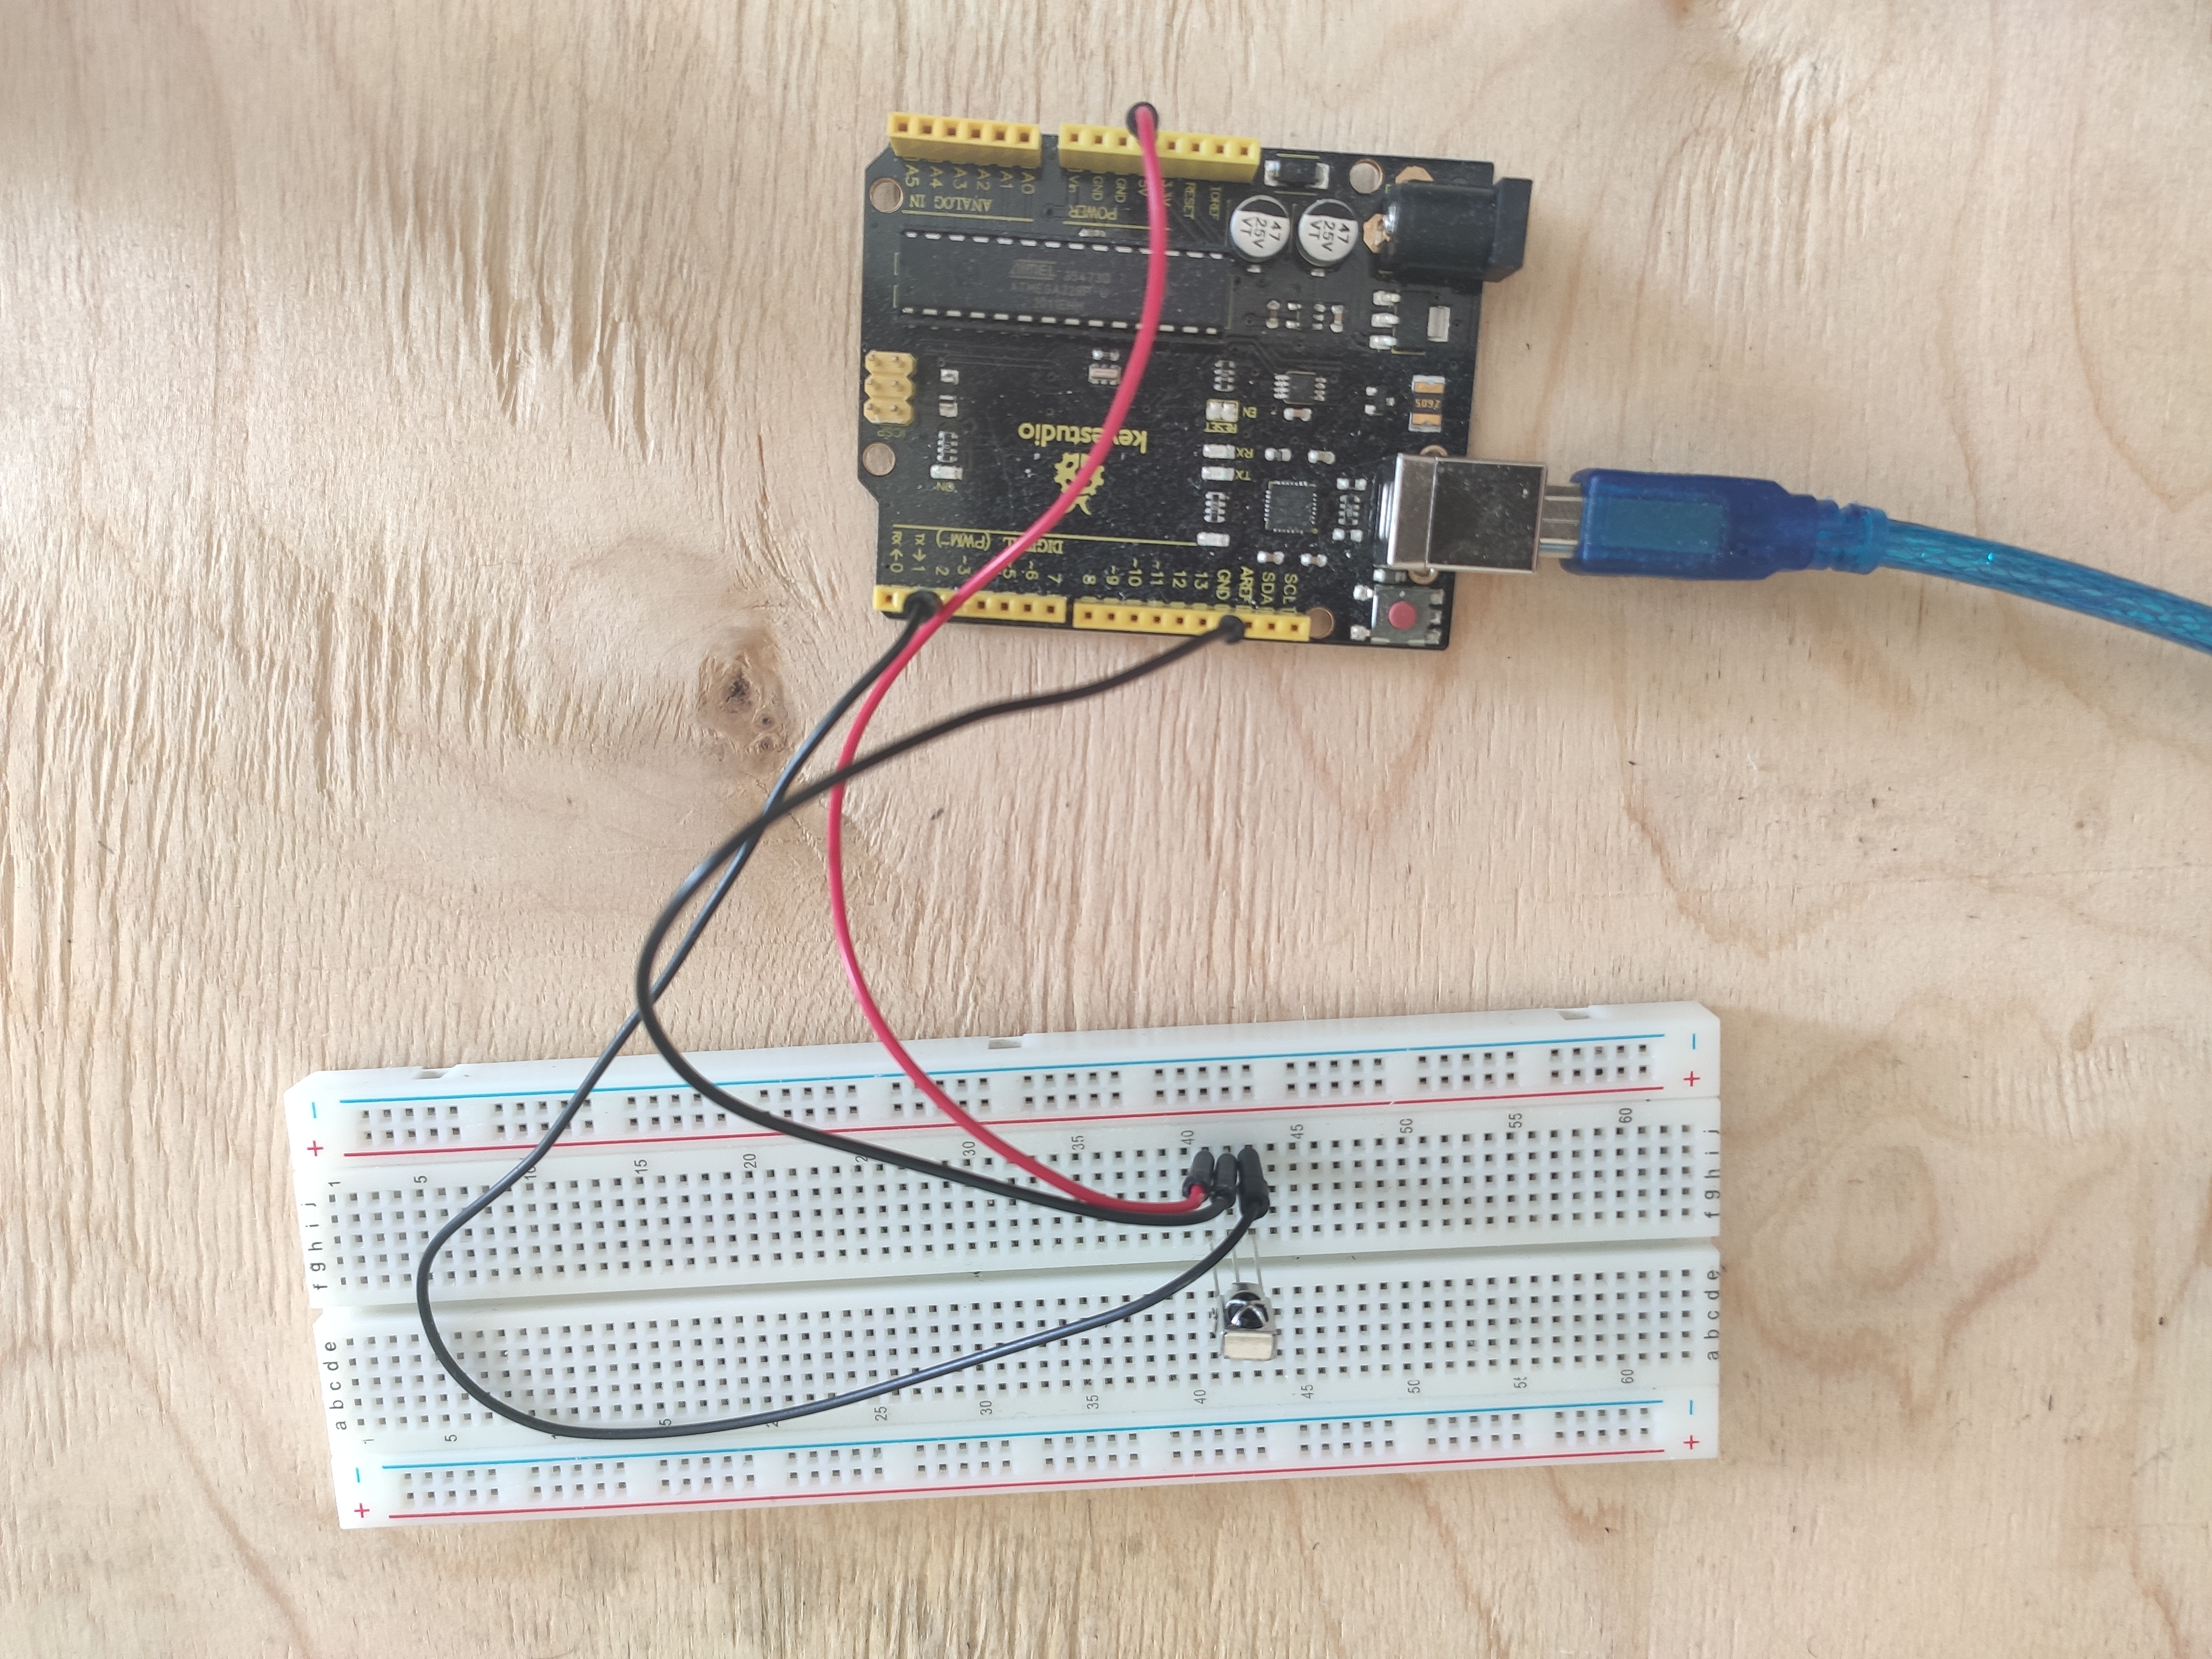
Pour recevoir un signal de la télécommande infrarouge, un récepteur est nécessaire, que nous connecterons à l'arduino via une maquette selon le schéma suivant:
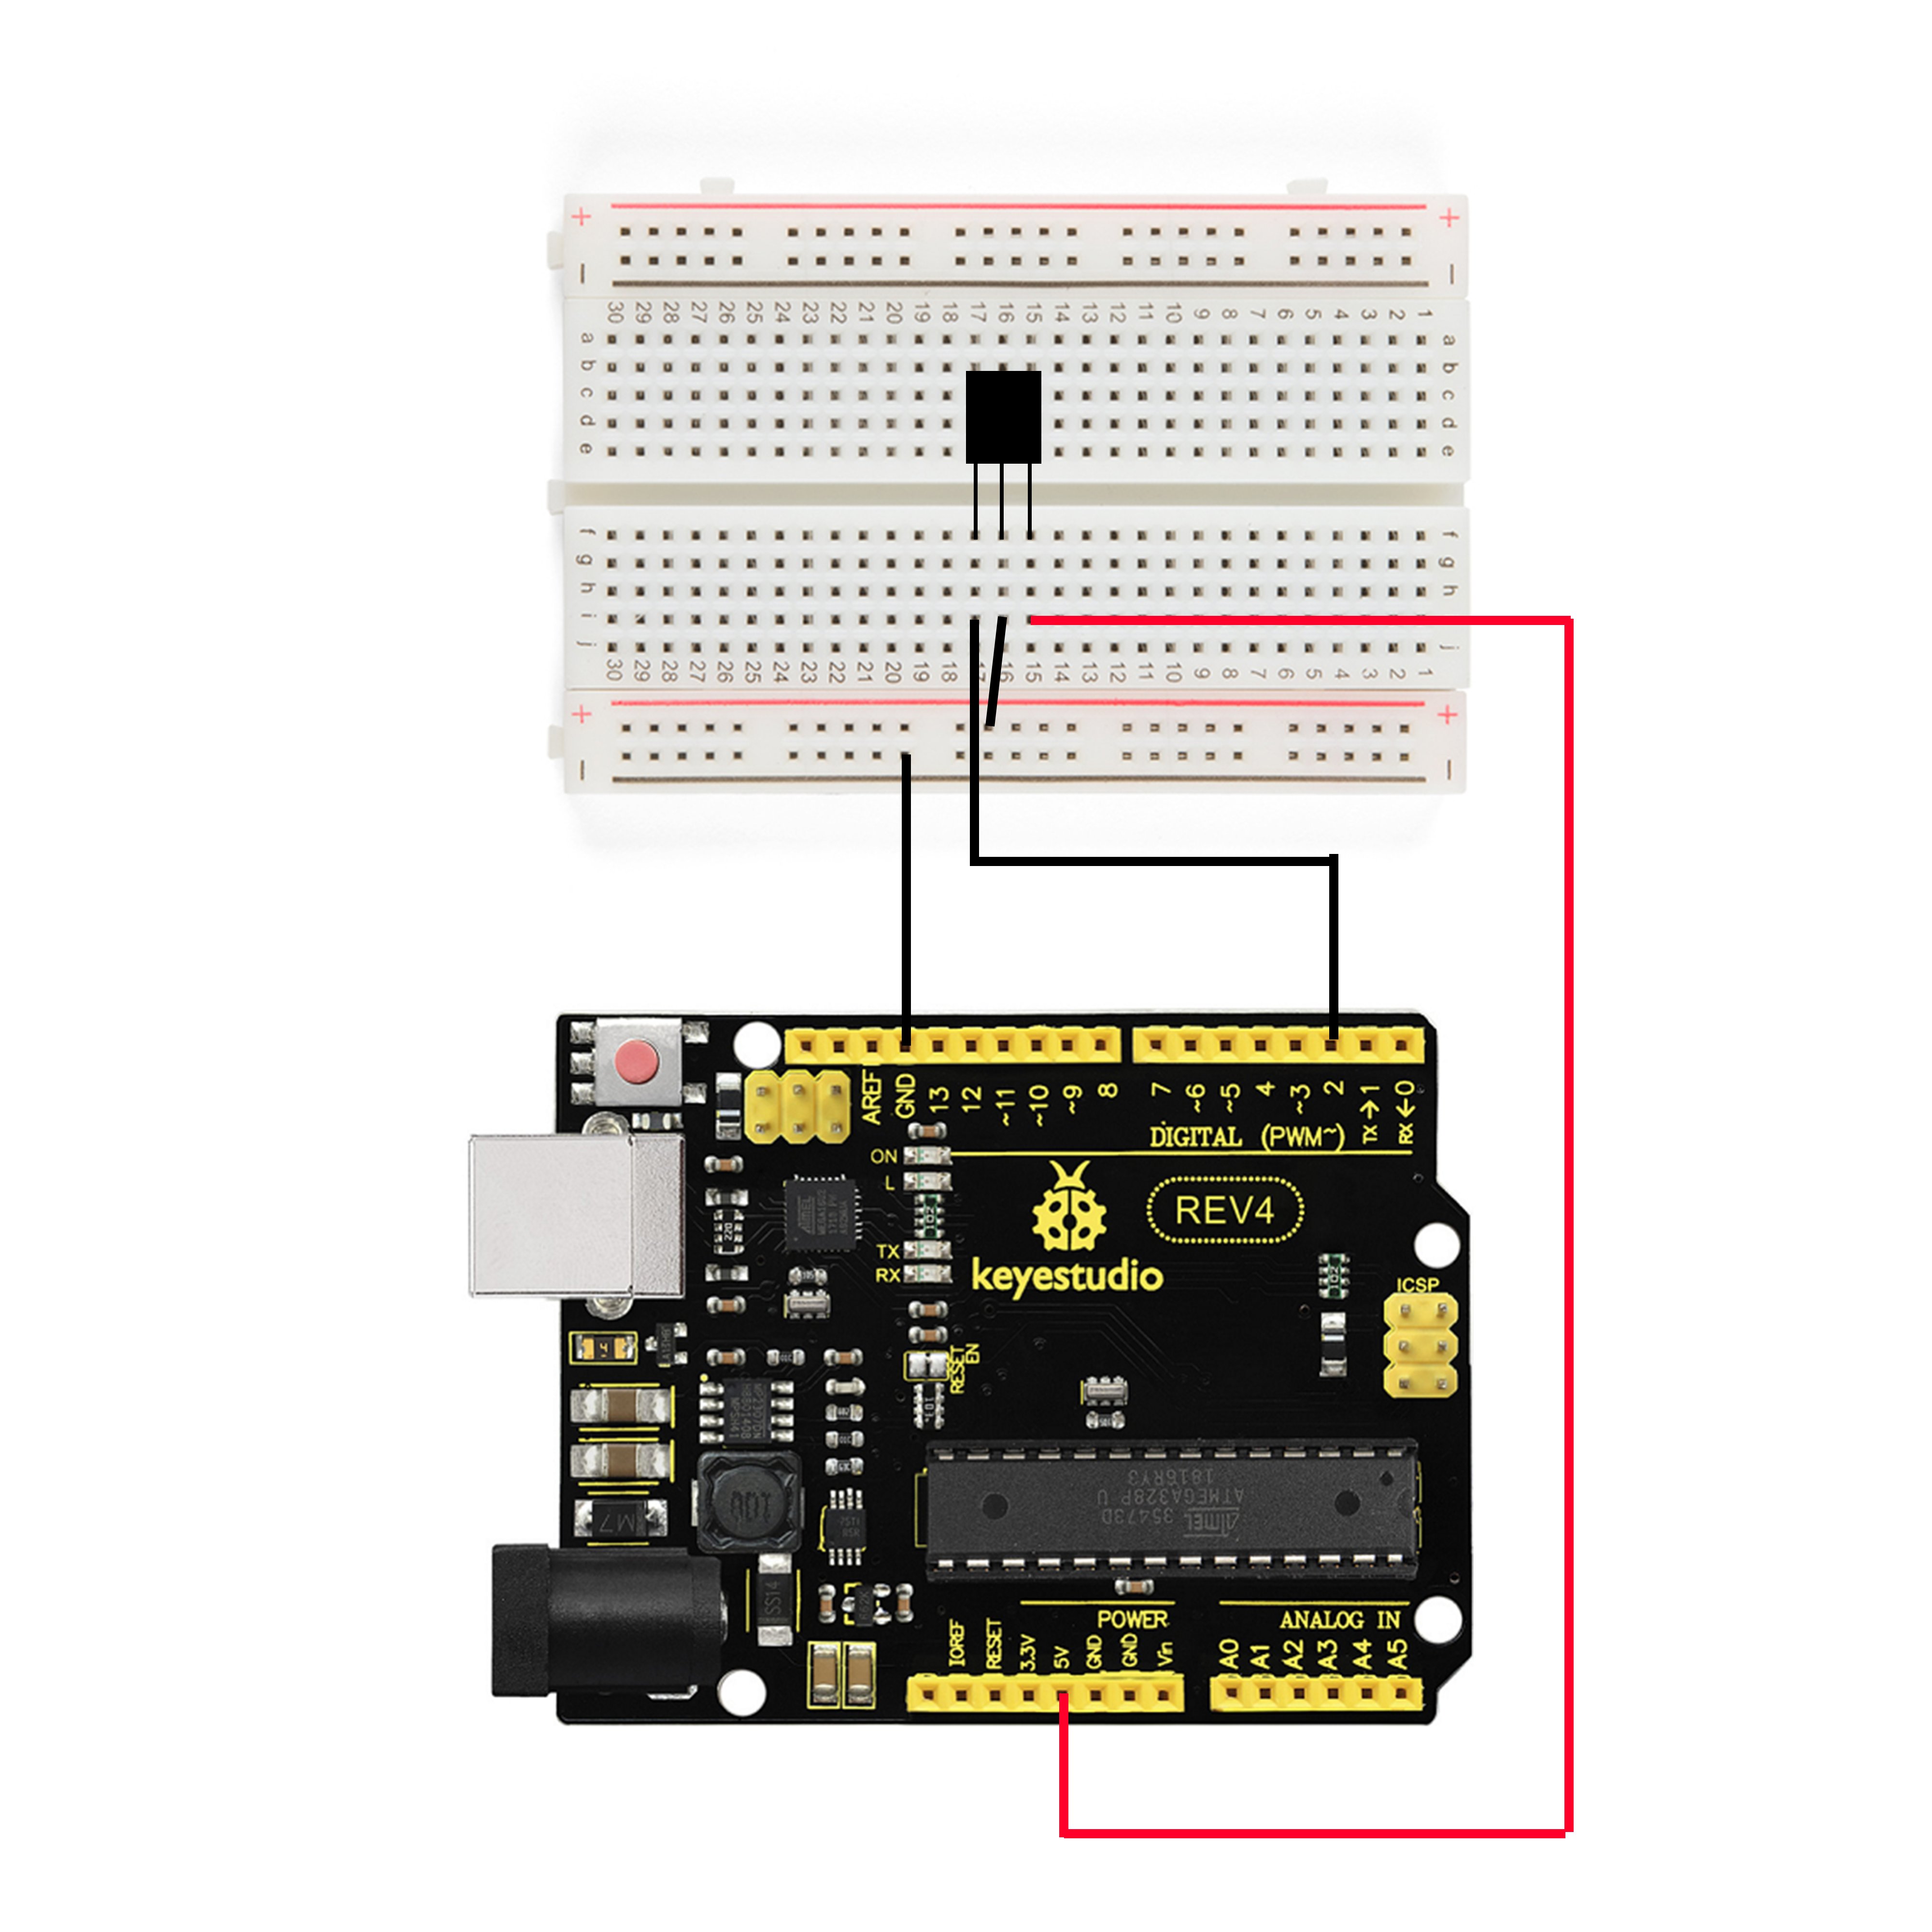

Pour qu'Arduino comprenne par quel protocole et avec quelle commande le signal est transmis, il existe la bibliothèque IRremote, qui, dans les nouvelles versions de l'IDE Arduino, peut être ajoutée à partir des bibliothèques standard.
(/ ). 5 .
, , , IrReceiver.decodedIRData.decodedRawData. , . . , . , :
#include <IRremote.h>
int IR_RECEIVE_PIN = 2; // 2-
long command;
void setup()
{
Serial.begin(9600);
IrReceiver.begin(IR_RECEIVE_PIN, ENABLE_LED_FEEDBACK);
}
void loop() {
if (IrReceiver.decode()) //
{
command = IrReceiver.decodedIRData.decodedRawData; /*
*/
switch(command) //
{
case 0xEA15FF00:
Serial.write("D"); delay(120);
break;
case 0xB946FF00:
Serial.write("U"); delay(120);
break;
case 0xBF40FF00:
Serial.write("P"); delay(120);
break;
case 0xBC43FF00:
Serial.write("N"); delay(120);
break;
case 0xBB44FF00:
Serial.write("R"); delay(120);
break;
}
IrReceiver.resume(); //
}
}
, , USB.
Windows
- . ++ Visual Studio Windows.h
, , SendInput :
INPUT Input = { 0 };
Input.type = INPUT_KEYBOARD;
Input.ki.wVk = VK_VOLUME_UP; /* ,
*/
SendInput(1, &Input, sizeof(Input));
ZeroMemory(&Input, sizeof(Input));
: (VK_VOLUME_UP, VK_VOLUME_DOWN); (VK_MEDIA_PLAY_PAUSE); "" (VK_MEDIA_NEXT_TRACK, VK_MEDIA_PREV_TRACK)
Serial port ?
USB, (Serial port), Windows COM , IBM PC. , , . Windows.h
#include <Windows.h>
#include <stdio.h>
#include <string.h>
int main(void)
{
HANDLE Port;
BOOL Status;
DCB dcbSerialParams = { 0 };
COMMTIMEOUTS timeouts = { 0 };
DWORD dwEventMask;
char ReadData;
DWORD NoBytesRead;
bool Esc = FALSE;
Port = CreateFile(L"\\\\.\\COM3", GENERIC_READ, 0, NULL, //
OPEN_EXISTING, 0, NULL);
if (Port == INVALID_HANDLE_VALUE)
{
printf("\nError to Get the COM state\n");
CloseHandle(Port);
}
else
{
printf("\nopening serial port is succesful\n");
}
dcbSerialParams.DCBlength = sizeof(dcbSerialParams);
Status = GetCommState(Port, &dcbSerialParams); //
if (Status == FALSE)
{
printf("\n Error to Get the COM state \n");
CloseHandle(Port);
}
dcbSerialParams.BaudRate = CBR_9600; //
dcbSerialParams.ByteSize = 8;
dcbSerialParams.StopBits = ONESTOPBIT;
dcbSerialParams.Parity = NOPARITY;
Status = SetCommState(Port, &dcbSerialParams);
if (Status == FALSE)
{
printf("\n Error to Setting DCB Structure \n ");
CloseHandle(Port);
}
timeouts.ReadIntervalTimeout = 10; /*
( ) */
timeouts.ReadTotalTimeoutConstant = 200;
timeouts.ReadTotalTimeoutMultiplier = 2;
if (SetCommTimeouts(Port, &timeouts) == FALSE)
{
printf("\n Error to Setting Timeouts");
CloseHandle(Port);
}
while (Esc == FALSE)
{
Status = SetCommMask(Port, EV_RXCHAR);
if (Status == FALSE)
{
printf("\nError to in Setting CommMask\n");
CloseHandle(Port);
}
Status = WaitCommEvent(Port, &dwEventMask, NULL); /*
( ) */
if (Status == FALSE)
{
printf("\nError! in Setting WaitCommEvent () \n");
CloseHandle(Port);
}
Status = ReadFile(Port, &ReadData, 3, &NoBytesRead, NULL); //
printf("\nNumber of bytes received = % d\n\n", sizeof(ReadData) - 1);
switch (ReadData) /*
*/
{
case 'U':
{
INPUT Input = { 0 };
Input.type = INPUT_KEYBOARD;
Input.ki.wVk = VK_VOLUME_UP;
SendInput(1, &Input, sizeof(Input));
ZeroMemory(&Input, sizeof(Input));
}
break;
case 'D':
{
INPUT Input = { 0 };
Input.type = INPUT_KEYBOARD;
Input.ki.wVk = VK_VOLUME_DOWN;
SendInput(1, &Input, sizeof(Input));
ZeroMemory(&Input, sizeof(Input));
}
break;
case 'P':
{
INPUT Input = { 0 };
Input.type = INPUT_KEYBOARD;
Input.ki.wVk = VK_MEDIA_PLAY_PAUSE;
SendInput(1, &Input, sizeof(Input));
ZeroMemory(&Input, sizeof(Input));
}
break;
case 'N':
{
INPUT Input = { 0 };
Input.type = INPUT_KEYBOARD;
Input.ki.wVk = VK_MEDIA_NEXT_TRACK;
SendInput(1, &Input, sizeof(Input));
ZeroMemory(&Input, sizeof(Input));
}
break;
case 'R':
{
INPUT Input = { 0 };
Input.type = INPUT_KEYBOARD;
Input.ki.wVk = VK_MEDIA_PREV_TRACK;
SendInput(1, &Input, sizeof(Input));
ZeroMemory(&Input, sizeof(Input));
}
break;
default:
printf("\n Error\n");
break;
}
PurgeComm(Port, PURGE_RXCLEAR); //
}
CloseHandle(Port); /* ,
*/
}
https://www.xanthium.in/Serial-Port-Programming-using-Win32-API
http://citforum.ru/hardware/articles/comports/
, , . : - .
Cette combinaison (télécommande + codes virtuels) a le potentiel de contrôler différentes parties du système d'exploitation. Par exemple, vous pouvez attribuer des programmes aux boutons ou créer quelque chose comme un contrôleur à partir de la télécommande. Mais le plus pratique, à mon avis, est la gestion des médias.